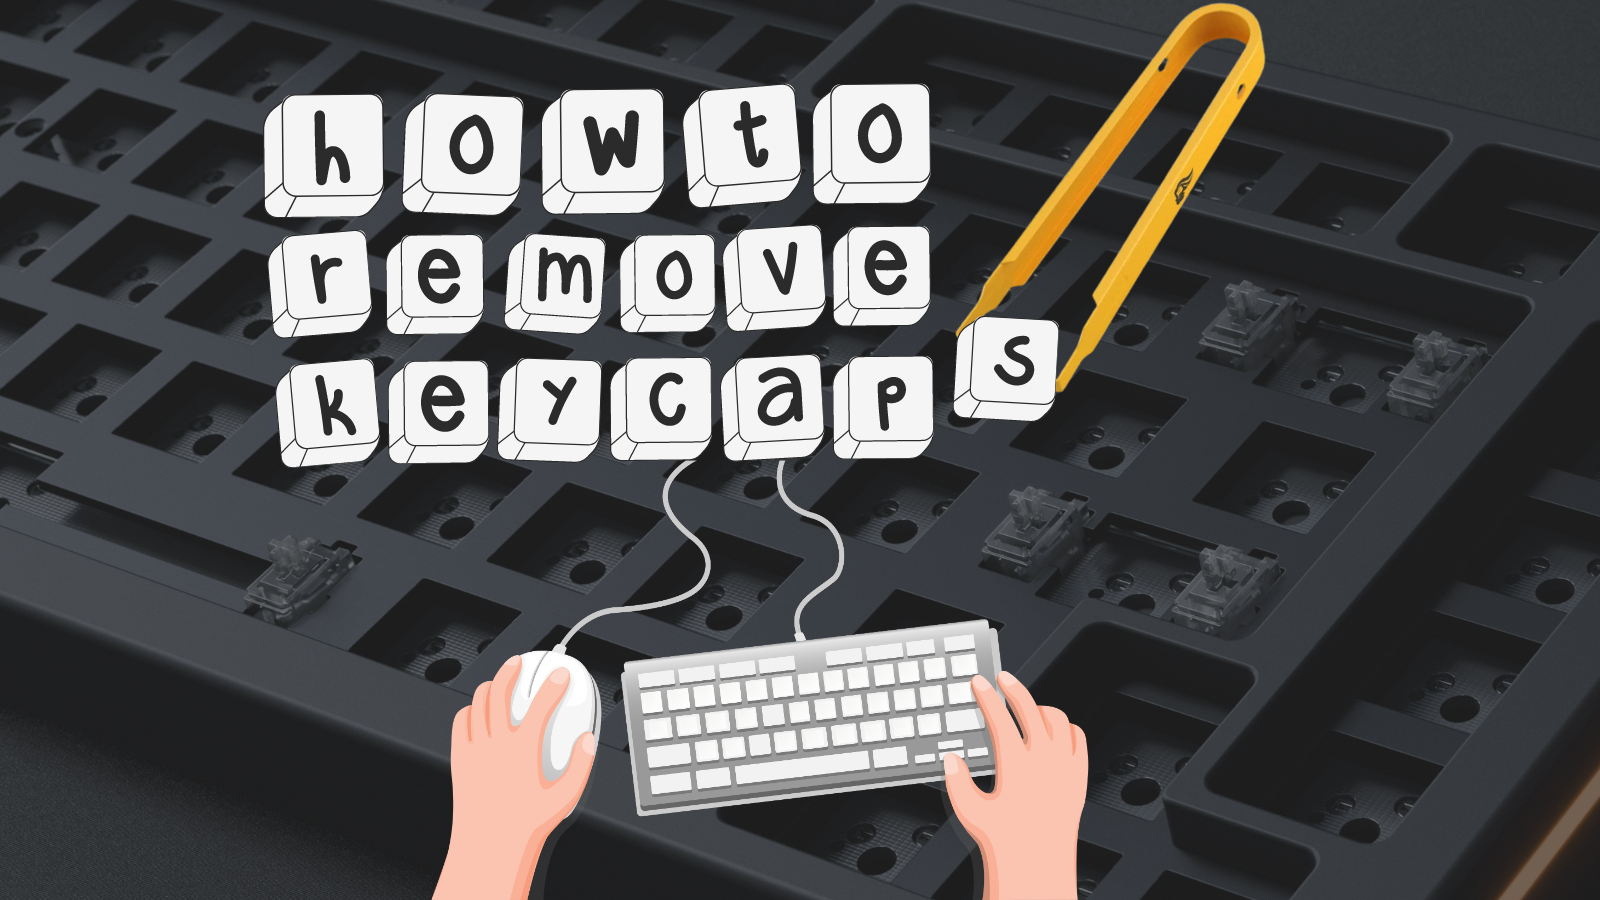
Whether you need to give your keyboard a deep clean or upgrade, knowing how to remove your keycaps is a useful skill. Whilst taking your keyboard apart might sound a little scary, it’s actually rather simple and opens up new possibilities for making your set-up your own.
If you don’t know how to remove your keycaps, you’re certainly in the right place! We’ve put together this step-by-step guide detailing everything you need to know. Covering the whys, what you need, and how to safely remove your keycaps.

Why Do I Need to Remove My Keycaps?
There are a few reasons why you might need to remove your keycaps. Your keyboard might be littered with pesky crumbs from your late-night snacking or perhaps you’ve spoilt yourself with a new shiny set of keycaps or switches.

What Do I Need to Remove My Keycaps?
To successfully remove your keycaps, you’ll need to ensure you’ve got all the right tools first. This includes:
- A keycap puller
- Any new keycaps (optional)
- A keyboard cleaning kit (optional)
Glorious Keycap Puller

- Keycap puller
- Designed to be used with mechanical keyboards
- Matte texture
- Ergonomic handle for enhanced comfort
Ducky 132 PBT ANSI/ISO Daisy Keycaps
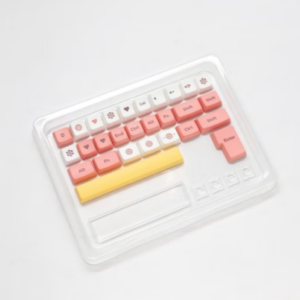
- 132 keycap set
- Compatible with ANSI and ISO layouts
- Constructed from PBT with dye-sub printing
- Novelty floral designs with pastel yellow, pink, and orange colour scheme
Glorious Mouse and Keyboard Cleaning Kit
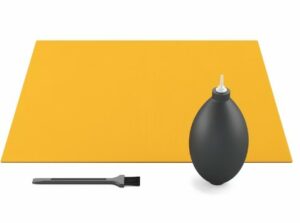
- Mouse and cleaning kit
- Includes microfibre cloth, power blower, and brush
- Designed to kill and protect your hardware against harmful bacteria
How to Safely Remove Keycaps From A Keyboard
Before you begin, we recommend you take a photo of your keyboard. This will be a huge lifesaver when it comes to putting your keyboard back together at the end as you won’t be left scratching your head trying to figure out where each key goes depending on your layout.
Be sure to also turn off your keyboard and unplug any wires before you start.
From here, grab your keycap puller and place the two tweezers around the keycap you wish to remove until it latches underneath. Gently pull to lift the keycap, making sure to avoid removing the key switch. We recommend placing all your keycaps in a bowl to make sure you don’t lose any. This step is purely optional and not needed if you are replacing your keycaps with a brand-new set.
To reattach your keycaps, simply press the cap down in place, pushing down firmly to ensure its secure. You might want to give it a few presses to ensure it’s latched on correctly.
Looking for More Keyboard Advice?
If you’re looking for even more helpful posts about looking after your keyboard to ensure it remains factory fresh for longer, the Overclockers UK blog has it all! We’ve got plenty of keyboard-related articles from how to build your own, why you want to lubricate your key switches, and our top tips for cleaning your keyboard.
Top Tips for Cleaning Your Keyboard

OcUK Academy: How to Build a Mechanical Keyboard

How to Lubricate Your Mechanical Keyboard

Is It Time to Upgrade Your Peripherals?
Are your peripherals looking a little worse for wear? Tired of your old keyboard not keeping up with your gaming needs? At Overclockers UK, you are sure to find your next upgrade for your battle station whether this is a shiny new mouse or high-quality keyboard.
You can shop all our peripherals by clicking the button below!
- 4 min read
Ruth Rowley
Author
Ruth has been with Overclockers UK for over a year and has gone on to write about everything ranging from in-depth hardware guides to monthly game releases.
Outside of writing blog posts, she can be found wrapped in a blanket with her black cat, engrossed in a book or playing life-simulation games such as The Sims, Stardew Valley, and Animal Crossing.
Read More >>