
Is your performance being plagued by unwanted shutdowns and freezing? If so, it might be time to test your PSU to ensure it’s working correctly and not damaging your other components.
But how do you test your PSU you ask? Keep on reading to find out more and see our handy step-by-step guide.

Please note, we do not accept liability if you experience any hardware damage after testing your PSU. In addition to reading our guide, to ensure you correctly test your PSU we also recommend you also do some extra research and watch online tutorials.
Why Would I Need to Test My PSU?
Testing your PSU isn’t something you’ll need to do every day, but it’s a good troubleshooting method if you think your power supply is failing.
A faulty PSU can cause multiple issues including unexpected shutdowns, random freezing, excess temperatures, and boot instabilities. In the long-term, a faulty power supply can also have a notable impact on your other components as well so it’s a good idea to identify any issues quickly.
How to Test Your PSU: A Step-by-Step
While testing your PSU may sound overly complicated and daunting, we’ve broken it down step-by-step to help simplify it.
Test Via a PSU Jumper
Before you begin, you’ll need either a paper clip or a PSU jumper to successfully complete this task. It’s crucial that you make sure you are jumping the correct pins when you test your power supply. Jumping the incorrect pins can result in injury and even damage to your PSU.
- Start by turning off your PC and shutting down your PSU via the main switch at the back of your PC case.
- Open up your chassis and unplug all the cables from your power supply expect for the main AC and 24-pin cables.
- Locate the 16th pin and 17th pin on your 24-pin cable. You can do this by counting from the left using your clip facing up and the pins facing you. They will typically be the 4th and 5th pins when counting from left to right which you can see in the photo below.

- Bend the paper clip so the ends can be inserted into pin 16 and 17. If you are using a PSU jumper, insert the ends of the jumper into pin 16 and 17.
- Turn on your power supply.
- Check to see if your PSU fans are turning. If they are, your power supply is functioning correctly. Please note that some PSUs feature a zero-RPM mode which means the fan may only spin for a short moment once turned on. However, this still means that your power supply is functioning normally.
Test Via Multimeter
You can also test your PSU with a multimeter. A multimeter measures electric values such as voltage or current and can be used to check if your PSU is faulty.
To use a multimeter, you’ll need to refer to the chart shown below.

- Set your multimeter to the correct DC metering mode according to the manufacturer.
- Place the black test cable in contact with the 24-pin cable or any of the other Ground pins on your PSU.
- While the back test lead is in contact with the Ground pin, place the red test lead into the pins individually (1-2, 4, 6, 9-14, 21-23) to get a voltage reading.
- A working PSU should typically have the following readings:

Test Via PSU Tester
In addition to this, you can use a dedicated PSU tester. To do this:
- Turn off your PC and shut down your PSU via the switch on the back of your case.
- Disconnect all your modular cables (if applicable).
- Plug in the 24-pin and 8-pin (4+4) cables into the tester and PSU.
- Plug in the AC power cord and turn on the power switch.
- The LCD screen on your PSU tester should now light up and show a series of readouts. We’ve included an image that breaks down these readouts below. The general rule of thumb however is that the PG value is considered normal if it falls within the 100ms-500ms range. A 0ms PG value would indicate that your PSU is failing.

- To test the peripheral/SATA connections, unplug the PSU from the AC power cable and turn off the PSU switch. Plug in either a single peripheral or SATA cable, plug in the AC cable, and flip the switch on the back of the PSU to on.
- The lights on the left side of the tester should light up to indicate power delivery. All three lights should appear when connecting a SATA cable, however, only the 12+V and +5V will appear when connecting any peripheral cables.
- Unplug the AC testing once the testing is complete and then disconnect the PSU cables.
Discovered that Your PSU is Faulty?
If your tests have uncovered that your PSU is faulty, then it’s time for an upgrade! At Overclockers UK, you can find an extensive range of power supplies boasting different capacities and 80 PLUS ratings.
We’ve picked out three of our faves to showcase below, but you can also explore our full collection of PSUs with the click of a button.
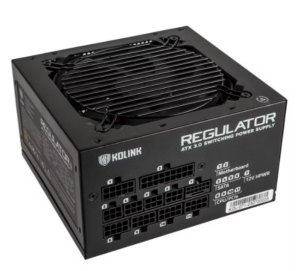
Kolink Regulator 750W 80 PLUS Gold Modular PSU
- Modular form factor
- 750W capacity
- 80 PLUS Gold rating
- PCIe 5.0 compatible

Phanteks AMP GH 850W 80 PLUS Gold Modular PSU
- Modular PSU
- 850W capacity
- 80 PLUS Gold rating
- ATX 3.0 complaint
ASUS ROG Strix 1000W 80 PLUS Platinum Modular PSU
- 1000W capacity
- 80 PLUS Platinum rating
- ATX 3.1 complaint
- PCIe 5.0 compatible

Learn More About Your Power Supply


Share Your Top Tips!
Have you recently tested your PSU? Do you have any top tips for making the process even easier? Help out your fellow gamers and leave them in the comments below.
- 5 min read
Ruth Rowley
Author
Ruth has been with Overclockers UK for over a year and has gone on to write about everything ranging from in-depth hardware guides to monthly game releases.
Outside of writing blog posts, she can be found wrapped in a blanket with her black cat, engrossed in a book or playing life-simulation games such as The Sims, Stardew Valley, and Animal Crossing.
Read More >>