
The Overclockers UK Academy is back!
In this blog article, we’re taking you step-by-step through how to clean and maintain your gaming PC to ensure it performs in tip-top-shape and looks fantastic.

Step-by-Step Video Guide
Too cool for reading? You can watch our dedicated step-by-step guide instead, in which Briony takes you through everything you need to know about cleaning and maintaining your PC.
Why Should You Clean Your PC
Regular PC cleaning may sound tedious, but it’s vital for ensuring it not only looks factory-fresh but performs smoothly. Dust can be a killer when it comes to your hardware. That thick layer of build-up on your fans isn’t for aesthetic purposes. In fact, it can have a notable impact on your PC’s thermals!
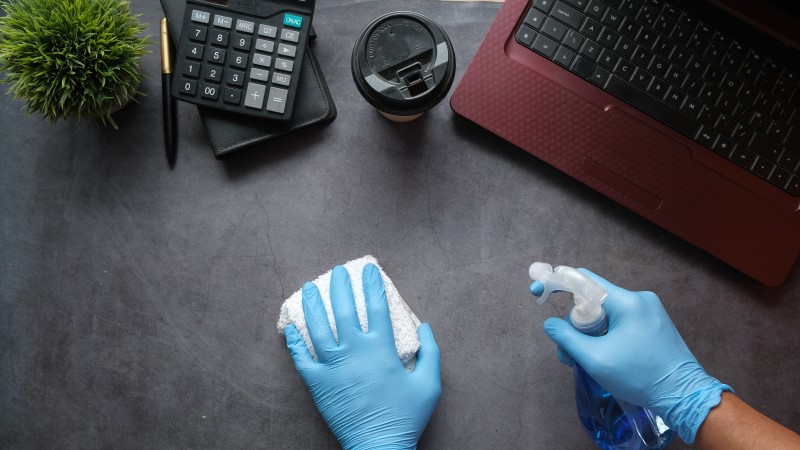
Hardware with significant dust build-up can’t perform as intended. Your fans are unable to draw and dissipate heat as effectively, resulting in excess temperatures and overheating, which can seriously damage the lifespan of your components.
What’s more, you’ve spent all that time (and serious money) creating the ultimate battle station with a unified aesthetic. A dirty, dust-filled PC isn’t the look we’re going for and keeping it clean can even make future upgrades a whole lot easier! As a result, you won’t have to spend unnecessary time cleaning the interior of your case. Instead, you can install your shiny new component and jump straight into exploring those gaming worlds at even better resolutions!
If you’re looking for more advice (or a gentle push) on why or how you should clean your gaming set-up, be sure to check out all our dedicated guides.


How to Maintain Your Gaming PC
Cleaning and maintaining your gaming PC doesn’t have to be a chore. Especially when you split up your list of tasks.
Our recommended cleaning schedule splits up different aspects of maintaining your PC into things you should do every month and things to do every six months. All of which combined will ensure your PC looks *chef’s kiss* for longer.
Before you undergo any PC cleaning or maintenance, be sure to first turn off your PC and disconnect it from the mains.
Monthly Maintenance
You should ideally maintain your dust filters once a month. This vital step helps to keep on top of any dust before it spreads out of control throughout your PC, along with ensuring a steady consistent flow of natural air. Plus, maintaining your dust filters may even reduce the need for you to conduct deep cleans of your PC, saving you time in the future. Give past you a pat on the back!

To do this, carefully remove the dust filters from your case. These are typically found on the front panel, top of your case, the bottom, and underneath the power supply. Depending on your model and fan layout, you may also have an additional dust filter on the back panel. Alternatively, if your PC case doesn’t have any dust filters, you’ll want to remove and carefully clean any mesh panels instead as these will still feature plenty of dust build-up and grim.

Keep any dust filters or mesh panels away from your sensitive components whilst you clean them, and the easiest way to do this is with a vacuum or even compressed air! This will blast away any unwanted dust or grim quickly. Any leftover stubborn particles or unwanted stains can be wiped away with a clean microfiber cloth. Just take care not to scratch your case.
Reinstall your clean dust filters or panels and that’s it! This process won’t take you long at all, especially with a hot cuppa and some good tunes on in the background.
If you find that your dust filters just aren’t that dusty once a month, you can increase the time in-between regular cleans. Alternatively, if there is a notable build-up after a month, you should take extra care and make time for more regular cleaning and maintenance. It all depends on your set-up!
Every Six Months
If you follow our above steps and ensure your dust filters are cleaned regularly, you should typically only need to deep clean your PC every six months. Even with good cleaning and maintenance, a deep clean can remove any unwanted fine dust from inside your case, helps to keep your components clean, and makes future upgrades even easier.
Any deep clean should begin with removing the side panels to grant you full access to the interior of your computer. To do this, you may need a screwdriver, depending on your model of case. If you are unsure on how to remove your side panels, refer to your manufacturer’s or case manual for more instructions.

Our next step can get rather messy! Therefore, we recommend you take your PC outside for its deep clean (that’s if it’s not raining). This could be on a patio table, porch, balcony, or whatever outdoor access you have that’s accessible. Alternatively, if you have no outdoor space, shut the door to the room where your PC is and open all the windows to guarantee plenty of natural air flow within the room to allow the dust to escape.
Now it’s time to clean up any dust in the interior of your case or on your components. For this step, don’t use a vacuum inside your PC as this can create static electricity and may even damage your sensitive hardware. Instead, we recommend you use an IT Duster.

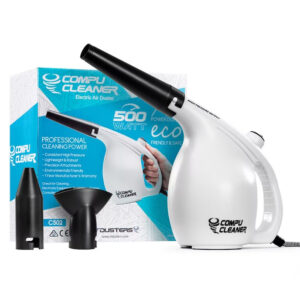
IT Dusters have been specifically designed to clean the interior of your PC, capable of blasting off any dust without contacting your vital components. Plus, its thin nozzle and attachments can get into all those hard-to-reach places.
IT Dusters CompuCleaner Electric Air Duster
- Electronic air duster
- Lightweight design
- Includes three nozzle attachments
When using an IT Duster, gently hold onto your fans to stop them from spinning whilst you clean to prevent any excess damage or dust flying around you. What’s more, any plastic components such as tubing, your AiO cooler, fans, and your case can be carefully wiped with a microfiber cloth but take extra care not to touch any sensitive hardware, such as your graphics card.
Once everything has had a good ol’ clean, it’s time to reattach all your side panels. Double-check that all your dust filters are back in place and that no cables have been knocked out of place before you turn your PC on.
During your deep clean if you come across any unexpected issues or need our expert advice, you can contact us. Maintenance is not covered under any Overclockers UK warranty; however, our friendly team of advisors is always here to help. So don’t hesitate to ring us or click the button below for more!
The Overclockers UK Academy
If you’ve found our above written or video guide helpful, be sure to check out the other informative articles in our Overclockers UK Academy. We’ve answered everything from how to reset a GPU to mounting an AiO.


Share Your Cleaning Tips!
Do you have any tips for cleaning and maintaining your PC? Share them in the comments below!
- 7 min read
Ruth Rowley
Author
Ruth has been with Overclockers UK for over a year and has gone on to write about everything ranging from in-depth hardware guides to monthly game releases.
Outside of writing blog posts, she can be found wrapped in a blanket with her black cat, engrossed in a book or playing life-simulation games such as The Sims, Stardew Valley, and Animal Crossing.
Read More >>