
The Overclockers UK Academy is back with our latest tutorial. Today, we’re showing you how to successfully mount an AiO cooler.

Watch How to Mount an AiO Cooler
Don’t have the time to read how to mount an AiO cooler? You can watch our dedicated video tutorial in which Briony takes you on a step-by-step journey.
What is an AiO Cooler?
An AiO is an ‘all in one’ CPU cooler that combines the elements of air and water cooling into one. They typically consist of a pump, radiator, water block, tubing, and multiple fans. All of which work in synch to draw and dissipate excess heat away from the processor. Some AiO coolers have extra aesthetic features, such as RGB lighting or even customisable LCD displays.

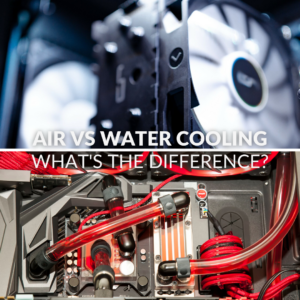
You can read more about AiOs and how they differ from traditional methods of air cooling or even custom water-cooling loops in our dedicated blog post.
How to Choose the Correct AiO for Your Set-Up
AiO coolers come in five different sizes which are determined by the dimensions of the radiator and number of integrated fans. You can find AiO that are:
- 120mm
- 240mm
- 280mm
- 360mm
- 420mm
You need to consider the size of the AiO you wish to install and how much space is inside your case. Most PC case manufacturers will list what radiators are compatible with that chassis so be sure to check any product pages or manuals before you keep on reading.

It’s not just the size of your case that matters, you also need to consider the requirements of your processors. The more powerful it is, the more heat it produces, and therefore the more cooling your CPU will need to perform at optimum temperatures.
We recommend you check the TDP of your processor, which will be listed on the manufacturer page, and select an AiO that will handle that TDP. We’ve listed the best coolers for specific wattages below.
- 120mm AiO – 150w
- 240mm AiO – 250w
- 280mm AiO – 300w
- 360mm AiO – 350w
- 420mm AiO – 400w
Why Is It Important to Mount Your AiO Correctly?
Choosing where to mount your AiO is crucial as this ensures optimum cooling and system stability. Otherwise, you won’t be able to achieve the level of performance that you desire. There are several factors you need to consider when mounting your AiO. This includes case design, airflow, and your own personal preference.
Depending on your chosen PC case, you may have multiple mounting options available, such as the top, front, or bottom of the chassis. Mounting the radiator at the top is typically the best configuration as generally mid and full towers have been designed to support this placement. With most PC cases, you can install a 240mm or even a 360mm AiO at the top to draw any excess heat up and exhaust it out of your case. You can choose the rotation of the radiator to suit your aesthetic, however, be sure the tubing doesn’t interfere with your fans.

Alternatively, you can install your AiO in the front, with most PC cases supporting a 360mm radiator in the front panel. However, this configuration only works best if the tubing is at the bottom and the top end of the radiator sitting above the pump. This ensures the air naturally sits on top of the radiator. Whilst air is normal inside an AiO, if it is trapped in the wrong place, this can notably decrease the efficiency and longevity of your cooler.
Our Step-by-Step Guide
In our example below, we’re using the MSI MAG Coreliquid 360mm AiO Cooler.
Gather Your Tools and Prep Your PC
Before you begin, you need to make sure you have all the key tools and components ready. This includes your cooler, thermal paste, a screwdriver, and either isopropanol or rubbing alcohol to clean your CPU.
Power down your PC, unplug all your cables, and open the side panel of the case. If you are replacing an existing cooler, carefully remove it by unscrewing the mounting brackets or clips. Gently clean off any residual thermal paste from the CPU using the isopropanol or alcohol and a soft cloth.
Install the Backplate
Now it’s time to start installing the AiO. Included with your cooler will be two backplates. One is compatible with Intel CPUs and the other with AMD. You’ll need to ensure you are using the correct backplate for your processor, which you can find in the manufacturer manual or even written on the bracket itself.
To install the backplate, align it with the holes on the back of your motherboard and attach it using the compatible screws or fittings that come with your AiO.

Connect the Fans
Next, attach the fans to the radiator using the included screws. If you aren’t sure which are the correct screws, check the manual.
You’ll need to ensure the fans are oriented to blow air through the radiator for optimum cooling performance. It’s easy to spot which round they go by looking closely at the fan blades. You may also want to consider the orientation of the cables to make cable management easier later on.
Mount the Radiator
Select a suitable position inside the case to mount the radiator, considering everything mentioned about why you need the correct configuration for your case. There will be screws included with the cooler that you can use to secure the radiator in place.

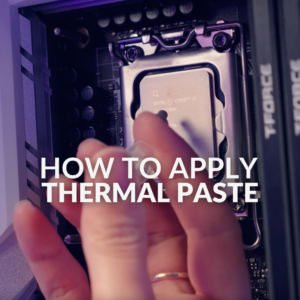
Apply Thermal Paste
Check to see if your cooler includes any pre-applied thermal paste. If it doesn’t, gently apply a small, pea-sized amount onto the centre of the processor. You can also use a line, a cross, or even carefully spread a thin layer on the CPU.
We’ve got a handy blog going into more detail on how to carefully apply thermal paste. Check it out if you need more support during this step.
Mount and Connect the Pump
Next, it’s time to mount and connect the pump. Remove any protective plastic and carefully position the pump over the CPU, ensuring the thermal paste makes good contact. Attach it in place using the included screws or bracket. Take care during this step to not damage the CPU or motherboard by overtightening the screws.

Find the pump header on your motherboard and connect the pump’s power cable to this header. This will provide the power you need for the pump to run. You can also use the CPU fan header and later configure it as an AiO pump in BIOS.

In addition to this, be sure to connect any RGB or fan control cables to the correct headers on your motherboard.
Tidy Up Your Cables
That’s it! You’ve successfully mounted an AiO cooler. Now it’s time to tidy up the cables inside your PC case, ensuring they are neatly routed and tucked away. You can secure them in place with some cable ties.
Testing Your New AiO Cooler
Now that your AiO is installed, it’s important you ensure everything is working perfectly and your hardware is staying cool. Overheating components can cause system instability and may even affect the longevity of your hardware.
There is plenty of dedicated software available that you can use to test your hardware’s performance and temperature. Our top recommendation is HWMonitor. This is an easy-to-use monitoring program that reads your PC main health sensors. You can use HWMonitor to run a benchmark, such as Cinebench, to put your CPU under load to create heat, allowing you to test the efficiency of your cooler.
Anything up to 85C is normal. Once it exceeds 90C, your CPU will begin throttling and reducing clock speeds as it’s getting too hot. If you notice the temperature shooting up and your processor overheating, check if your fans are spinning on your cooler before turning off your PC. Double-check that the pump cable is plugged in correctly and set as a pump header in BIOS, along with making sure that the CPU block is mounted securely and making good contact with your processor.
The Overclockers UK Academy
If you’ve found our AiO cooler tutorial helpful, check out all the other written and video guides in our Overclockers UK Academy. We’ve covered virtually everything from reseating a GPU to building a custom mechanical gaming keyboard.
How to Build a Mechanical Keyboard

How to Choose and Upgrade Your RAM

How to Reset Your BIOS

- 8 min read
Ruth Rowley
Author
Ruth has been with Overclockers UK for over a year and has gone on to write about everything ranging from in-depth hardware guides to monthly game releases.
Outside of writing blog posts, she can be found wrapped in a blanket with her black cat, engrossed in a book or playing life-simulation games such as The Sims, Stardew Valley, and Animal Crossing.
Read More >>